Fascia, Rake, Soffit & Frieze Board Renovation to Gable Side of Home Near Midtown.
When I first took on this project, I knew it was going to be tough. The gable peak was pretty steep, a roofing ledge was in the way, and my work area was centered with a gnarly stained glass window. I wanted to be precise quick with this.. But a rake, soffit & frieze board renovation ain’t something you want to rush at 30 feet.
A Bit About the Exterior Repair.
When Katy first called me, she had been putting off repairs for a while. Teaching has its priorities. So, the damage was pretty bad. Squirrels had been having their way in with front corner (as you’ll see in a photo). Despite the difficulty level, I knew it was an opportunity to show what I can do.
A Bad Start Almost Slowed Me.
The first day on the job, I realized I was in for quite the treat. The overgrown bushes in the front were more of a problem than I originally thought. Luckily for me, I brought the hedgers. Unfortunately, the only working outlet was from the back patio. The cords I had with me did not reach.
I also noticed that I’d have to replace some of the fascia board around the corner. When it started raining, I started thinking it was time to call it a day. But its not like a rake, soffit and frieze board repair gets better in the morning. So, I started pulling things apart to see what I was dealing with.
The cool weather in September was kind of nice.
Fixin' Up the Exterior Framing.
The first thing I wanted to do was see how bad the framing was. I figured the problem was behind the siding. But water was actually coming in behind the moulding. Since the rotting was a bit worse than I thought, I added a few outriggers to the framing and repaired the eave.
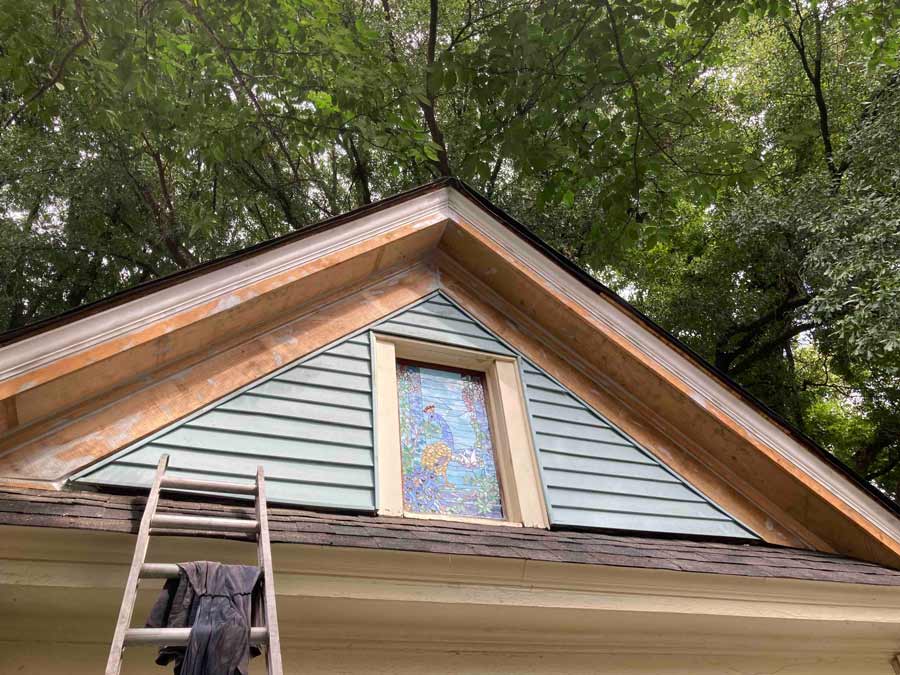
Building the Rake, Soffit & Frieze Board.
The rake (basically the facia) that I pulled off was pretty rough. This made it tough to figure out the angles. But that’s why we have brains and math. I picked up some solid 1×12″ and 1×10″ cypress wood from Germantown Lumber.
After spending too much time overthinking my cuts, I finally went with my gut and got some wood up. The look was perfect. The thicker soffit and frieze board fit snug and sealed up the edges well. I added a little flashing just to keep the squirrels at bay. I was really happy with the way it turned out.
Sometimes, Quality Takes Time.
I barley had enough crown moulding to complete to corner. As you can see, that soffit area was something. A lot of caulk was used and a handful of near falls occurred.. But I was happy to do it.
I’m even more happy it’s done. Thanks for the support. jt@1handycraftsman.com
Need exterior work done?
Eave, fascia, rake, soffit & frieze board renovations for the Memphis area.